How I Make Engaging Videos Without a Huge Budget
Creating compelling video content often feels like an exclusive club, accessible only to those with hefty budgets, professional crews, and state-of-the-art equipment. This misconception can deter countless creators from ever starting, or lead them down a rabbit hole of unnecessary spending. However, after years in the trenches of content creation, I’ve discovered a powerful truth: the most impactful and engaging videos without a huge budget are not only possible but, in many ways, superior. This article will share my journey and the actionable strategies I’ve honed to produce high-quality, captivating video content that resonates deeply with audiences, all while keeping costs minimal.
Why I Ditched Big Budgets
For a long time, I believed the conventional wisdom: to make great videos, you needed great gear, a dedicated studio, and a significant cash injection. My early attempts at video production were often hampered by this mindset. I’d spend hours researching the latest cameras, lenses, and lighting kits, convinced that a bigger budget was the only path to professional-looking results. The reality, however, was a constant struggle with overspending, under-delivery, and a nagging feeling that something was missing, even when I did invest heavily. It was a frustrating cycle that often left me with less money and not necessarily better content.
The turning point came when I started observing creators who were genuinely connecting with their audiences, despite their seemingly humble setups. Their videos weren’t slick Hollywood productions; they were raw, authentic, and utterly captivating. This realization sparked a fundamental shift in my approach. I began to question the assumption that quality was directly proportional to cost. Instead, I started to explore how to make engaging videos on a budget, focusing on the elements that truly mattered to viewers rather than the shiny new equipment. This pivot wasn’t just about saving money; it was about reclaiming creativity and focusing on the core purpose of video: communication and connection.
Ditching the big budget mentality was incredibly liberating. It forced me to be more resourceful, more creative, and more intentional with every aspect of my video production. I learned that constraints can be a powerful catalyst for innovation. Instead of chasing the latest gadget, I began to ask: “”What do I really need to tell this story effectively?”” This question became the cornerstone of my low budget video production philosophy. It allowed me to strip away the unnecessary, focus on foundational skills, and ultimately, produce content that felt more genuine and resonated more deeply with my audience. The freedom from financial pressure also meant I could experiment more, take risks, and develop a unique style that wasn’t dictated by expensive tools.
Gear You Actually Need
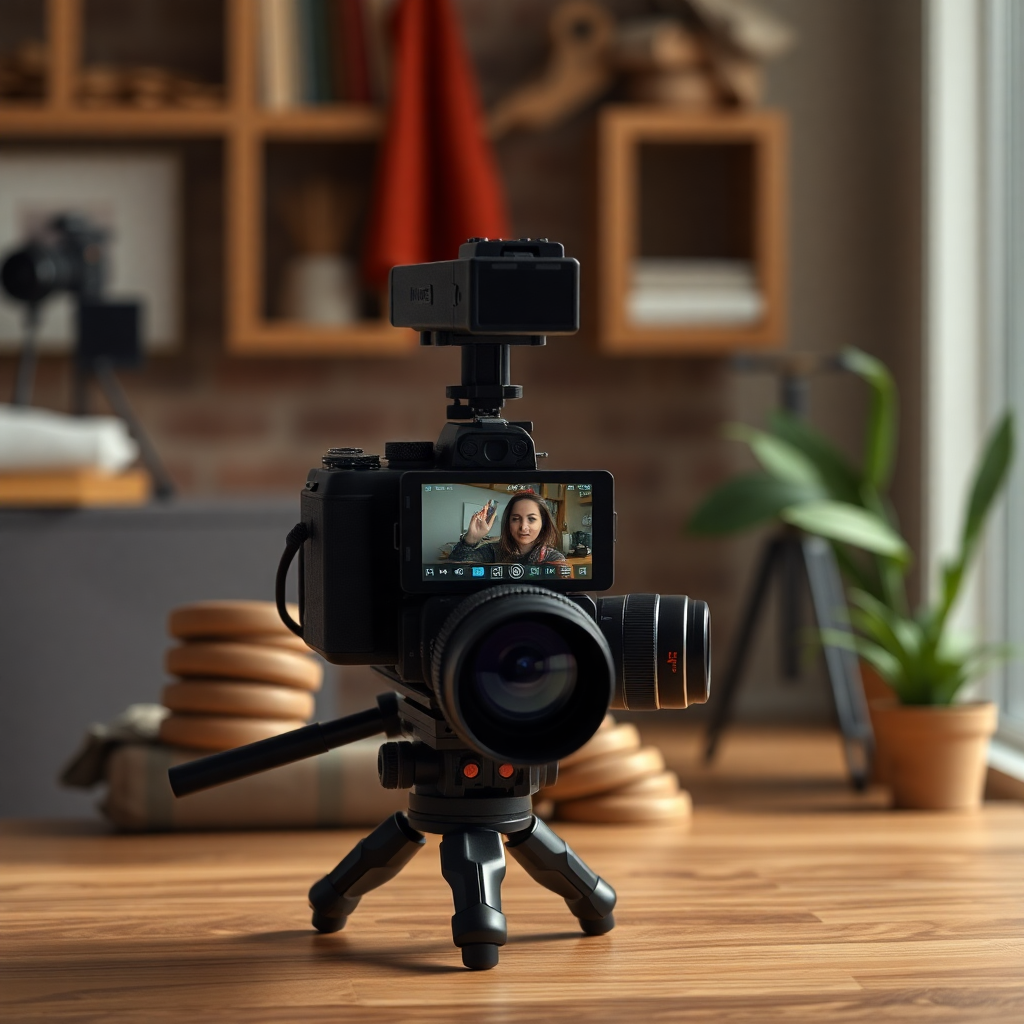
Let’s be clear: you do not need a RED camera, a drone, or a full lighting truck to create engaging videos cheaply. The biggest myth in video production is that expensive gear equals quality. While high-end equipment certainly has its place in specific productions, for the vast majority of online content, it’s overkill and often distracts from the true goal: connecting with your audience. My journey taught me that the most powerful tool you possess is your creativity, followed closely by a few key, affordable pieces of equipment.
The most accessible and often overlooked piece of equipment is the smartphone you already own. Modern smartphones, even mid-range models, boast incredible video capabilities. They shoot in 4K, have excellent image stabilization, and are incredibly portable. Learning to maximize your phone’s camera settings – understanding exposure, focus, and white balance – is far more valuable than splurging on a DSLR you don’t know how to use. I’ve produced countless pieces of affordable video content creation using nothing more than my iPhone, proving that the device in your pocket is often more than sufficient.
Beyond your phone, there are a few genuinely useful, budget-friendly additions that can dramatically improve your video quality without breaking the bank. These are not about making your video look like a Hollywood blockbuster, but about addressing common production pitfalls.
- A basic tripod or gimbal: This is crucial for stable, professional-looking shots. Even a small, flexible tripod for your phone can make a huge difference, eliminating shaky footage that screams “”amateur.”” You can find decent phone tripods for under $20.
- An external microphone: We’ll dive deeper into audio, but a simple lavalier microphone (clip-on mic) for your phone or a USB microphone for your computer is a game-changer. Bad audio is the quickest way to lose an audience.
- A simple lighting solution: While natural light is king, a small LED panel or even a basic ring light can provide fill light or illuminate you in darker environments. Again, these can be found for under $50.
- What is the core message? What do I want my audience to understand or feel?
- Who is this video for? What are their interests, pain points, or desires?
- What’s the hook? How will I grab their attention in the first few seconds?
- What’s the journey? How will the story unfold, and what emotional beats will it hit?
- What’s the call to action? What do I want viewers to do after watching?
- Pacing is everything: Keep your edits tight and your cuts purposeful. Eliminate dead air, hesitations, and unnecessary footage. Faster pacing often keeps viewers more engaged, especially in short-form content.
- Utilize B-roll: These are supplementary shots that add visual interest and help illustrate your points. They can be simple cutaways, close-ups, or even stock footage (many free options exist online like Pexels or Pixabay). B-roll breaks up talking head shots and makes your video more dynamic.
- Strategic transitions: Don’t overdo fancy transitions. Simple cuts, dissolves, or wipes are often the most effective. Use transitions to guide the viewer’s eye and maintain flow, not to distract them.
- Basic color grading: Even a subtle adjustment to contrast, saturation, and white balance can give your footage a more cinematic and polished look. DaVinci Resolve excels at this, but even basic apps offer rudimentary color correction tools.
- Text overlays and graphics: Use on-screen text to highlight key points, introduce speakers, or add calls to action. Simple, clean graphics can enhance understanding without requiring complex animation.
- Record in a quiet environment: This is the cheapest and most effective tip. Turn off air conditioners, fans, refrigerators, and silence notifications. Choose a room with soft furnishings (couches, curtains, carpets) to absorb sound and reduce echo.
- Get the microphone close to your subject: The closer the mic is to the sound source (your mouth), the better. This is why lavalier mics are so effective.
- Monitor your audio: If possible, listen to your audio with headphones while recording. This allows you to catch issues like clipping, hums, or unexpected background noises in real-time.
- Basic audio editing: Even free editing software like DaVinci Resolve or Audacity (a free audio editor) allows you to perform basic noise reduction, equalization (EQ), and compression. These tools can clean up minor imperfections and make your voice sound richer and more consistent.
- Consider a portable audio recorder: For slightly more advanced setups, a small portable recorder (like a Zoom H1n) paired with a lav mic can offer even better quality and more control, often for under $100.
- A simple ring light: These are incredibly popular and effective for solo creators. They provide soft, even lighting that minimizes shadows and gives a pleasing catchlight in the eyes. You can find decent ring lights for smartphones for $20-$50.
- LED panel lights: Small, portable LED panels with adjustable brightness and color temperature are a fantastic investment. They offer more flexibility than ring lights and can be used as key lights or fill lights. Many options are available for under $100.
- DIY softboxes/reflectors: You don’t need to buy expensive softboxes. A white sheet of paper, a piece of foam board, or even a white t-shirt can act as a reflector to bounce light back onto your subject, filling in shadows. You can also diffuse harsh lights by placing a white bedsheet or shower curtain in front of them.
- Using household lamps: Don’t underestimate the power of existing lamps. Position a desk lamp strategically to illuminate your face, perhaps bouncing it off a wall or a DIY reflector for softer light. Just be mindful of color temperature if mixing different light sources.
Remember, the goal is not to accumulate gear, but to acquire the minimal tools necessary to tell your story effectively. Focus your investment on what truly impacts viewer experience: stable visuals and clear audio. Everything else is secondary, especially when you’re learning how to make high quality videos on a budget.
The Story’s Your Superpower
If there’s one secret weapon I’ve discovered in the quest for engaging videos without a huge budget, it’s the power of storytelling. No amount of fancy gear or expensive effects can compensate for a weak narrative. Your story is the backbone of your content, the reason people will watch, share, and remember what you create. It’s what differentiates a mere recording from a captivating experience, and it costs absolutely nothing to develop. Neglecting this fundamental aspect is one of the biggest mistakes I see new creators make, often prioritizing visual flair over substance.
Before I even think about pressing record, I spend significant time on pre-production, which is essentially the planning phase. This involves outlining my message, identifying my target audience, and crafting a compelling narrative arc. For me, this means asking:
This meticulous planning is the most powerful tool for how to make engaging videos without huge budget. A well-structured script or detailed outline ensures clarity, coherence, and impact. It helps you stay on track during filming, reduces editing time, and prevents rambling. Even for seemingly simple videos like tutorials or vlogs, having a clear beginning, middle, and end, along with key talking points, makes a world of difference. It’s the difference between a spontaneous monologue and a purposeful conversation.
Think of your story as the blueprint for your video. It guides every decision, from camera angles to editing choices. A strong narrative can make a simple setup feel epic, and a compelling personal anecdote can transform a dry topic into something deeply relatable. This emphasis on narrative is a cornerstone of diy engaging video production, allowing you to compensate for any technical limitations with sheer creative force. It’s about connecting with your audience on a human level, sharing insights, solving problems, or simply entertaining them in a way that feels authentic and memorable. Prioritize your story, and watch your low-budget videos outperform many high-budget counterparts.
Free Editing Magic Tricks
Once you’ve captured your footage and crafted your compelling story, the next step is to bring it all together in the edit. This is where the real “”magic”” happens, transforming raw clips into a polished, engaging video without a huge budget. Many assume professional editing software comes with a hefty price tag, but the truth is, there are incredibly powerful and free options available that can produce stunning results. This is a critical area for creative video techniques low cost.
My go-to choice for professional-level editing on a budget is DaVinci Resolve. It’s a full-fledged Hollywood-grade editing suite that offers incredible features for free, including professional color grading, audio post-production, and visual effects. While it has a learning curve, the investment of time will pay dividends. For simpler edits, or for those working primarily on mobile, apps like CapCut or iMovie (for Apple users) are fantastic. They’re intuitive, offer a surprising array of features, and are perfect for how to make videos engaging cheaply. Even Shotcut and Kdenlive are excellent open-source alternatives for desktop users.
Beyond the software itself, mastering a few key editing principles can elevate your content dramatically:
Remember, the goal of editing is to enhance your story, not to create a visual spectacle for its own sake. With free software and a focus on these fundamental techniques, you can produce make high quality videos on a budget that rival those made with far more expensive tools. The most powerful editing “”magic”” comes from your understanding of storytelling and how to use cuts, pacing, and visuals to serve that narrative.
Don’t Forget Your Sound!
If there’s one aspect of video production that’s consistently underestimated, it’s audio. Viewers are far more forgiving of imperfect visuals than they are of bad sound. A video with stunning cinematography but muffled, noisy, or distorted audio will quickly be abandoned. Conversely, a video with relatively simple visuals but crystal-clear, professional-sounding audio can hold an audience’s attention with ease. This is why good audio is paramount for engaging videos without a huge budget, and it’s an area where a small investment makes a monumental difference.
The built-in microphone on your camera or smartphone is rarely sufficient. It picks up too much room echo, background noise, and often sounds distant. The solution doesn’t require a sound engineer or expensive studio equipment; it requires a strategic, budget-friendly approach. My primary recommendation for low budget video production audio is a simple lavalier microphone (a small clip-on mic). You can find excellent quality lav mics that plug directly into your smartphone for as little as $20-$40. These mics are designed to isolate your voice, significantly reducing ambient noise and improving clarity.
Here are some actionable tips for achieving great audio on a budget:
Investing a small amount of time and money into good audio will elevate your affordable video content creation exponentially. It shows professionalism, respect for your audience, and ensures your message is heard clearly. Never compromise on sound; it’s the silent hero of make engaging videos on a budget.
Simple Lighting That Works
Lighting is another aspect that often intimidates creators looking to produce engaging videos without a huge budget. Many envision complex setups with multiple lights, softboxes, and reflectors, believing that such equipment is essential for a professional look. While professional studios do use sophisticated lighting, you can achieve incredibly effective and flattering results with very simple, often free, or extremely low-cost solutions. The key is understanding the basic principles of light and how it interacts with your subject.
My absolute favorite and most budget-friendly lighting source is natural light. The sun provides a beautiful, soft, and free light source that can make anyone look fantastic. Position yourself facing a large window, and let the natural light illuminate your face. Avoid direct, harsh sunlight, which can create strong shadows and overexposure. Instead, aim for diffused light, perhaps on a cloudy day or by using a sheer curtain to soften the light. This simple technique alone can transform your diy engaging video production from amateur to appealing.
When natural light isn’t available or isn’t sufficient, there are highly affordable artificial lighting solutions:
The goal with lighting for budget friendly video making tips is not to create a perfectly lit studio, but to ensure your subject is well-lit, free from harsh shadows, and clearly visible. Understanding the basic three-point lighting system (key light, fill light, backlight) can guide your setup, even if you’re only using one or two affordable lights. The key light is your main source, the fill light softens shadows created by the key, and the backlight separates your subject from the background. Experiment with positioning, and you’ll quickly discover how simple lighting changes can dramatically enhance the visual appeal of your videos, making them more professional and engaging.
My Biggest Budget Blunders
Looking back, my journey to creating engaging videos without a huge budget is paved with lessons learned, many of them from my own missteps. While I now champion resourcefulness, my early days were characterized by a series of costly blunders that taught me the hard way what truly matters in video production. Sharing these mistakes, I hope, can help others avoid the same pitfalls and accelerate their path to make high quality videos on a budget.
One of my most significant blunders was obsessing over camera body upgrades. I fell for the marketing hype, constantly believing that the next, more expensive camera would magically unlock professional quality. I spent hundreds, sometimes thousands, on new cameras, only to find that my videos weren’t dramatically better. The image might have been technically sharper, but the storytelling was still weak, the audio was still poor, and the lighting was still haphazard. This taught me that the person behind the camera, their skills, and their creative vision are infinitely more important than the camera itself. It was a costly lesson in realizing that what do you need for low budget video production is primarily skill and strategy, not just gear.
Another major mistake was neglecting pre-production. In my eagerness to just “”start shooting,”” I’d often jump into filming without a clear plan, script, or even a basic outline. The result was hours of rambling footage, disjointed narratives, and an excruciating editing process trying to piece together a coherent story from chaos. This not only wasted immense amounts of time but also produced videos that lacked focus and failed to engage. I learned that meticulous planning, though seemingly time-consuming upfront, saves countless hours in the long run and is absolutely essential for how to make videos engaging cheaply. It’s the free foundation of effective video.
Finally, I made the classic mistake of underestimating the importance of audio and lighting. For a long time, I focused almost exclusively on the visual quality of the camera, thinking that good image would carry the video. I’d record in noisy environments with terrible room echo or shoot in poorly lit spaces that left my face in shadow. My videos suffered immensely. It was only after dedicating a tiny fraction of my budget to a simple lavalier microphone and learning to use natural light effectively that I saw a dramatic improvement in viewer retention and engagement. This was a stark realization that can you make good videos with no money if you prioritize these fundamental elements. These blunders taught me that true quality in video production tips budget comes from mastering the fundamentals, not from spending lavishly on superficial upgrades. Focus on story, sound, and light, and you’ll avoid the most common and costly mistakes.
Conclusion
The journey to creating engaging videos without a huge budget is less about the equipment you purchase and more about the mindset you adopt. It’s a testament to the power of creativity, resourcefulness, and a deep understanding of what truly connects with an audience. My own path, marked by early missteps and eventual breakthroughs, has solidified my belief that anyone, regardless of their financial resources, can produce compelling and high-quality video content.
We’ve explored how ditching the “”big budget”” mentality liberates your creativity, allowing you to focus on the core elements that truly matter. We’ve demystified the gear you actually need, proving that your smartphone and a few affordable accessories are often more than enough. The undeniable superpower of a well-crafted story, the transformative potential of free editing software and smart techniques, and the critical importance of clear audio and effective lighting—all of these are accessible tools that don’t require a significant financial outlay. My biggest budget blunders reinforced the crucial lesson that skill and strategy always trump expensive equipment.
Ultimately, the goal is not to produce a video that looks expensive, but one that feels valuable, authentic, and engaging. By prioritizing your message, refining your storytelling, and mastering the fundamental techniques of sound, light, and editing with the tools you already have, you can bypass the financial barriers that often deter aspiring creators. Embrace the constraints, let them fuel your ingenuity, and you’ll discover that the most impactful and engaging videos without a huge budget are not just possible, but often the most memorable. Start creating today, and let your creativity, not your wallet, be your guide.